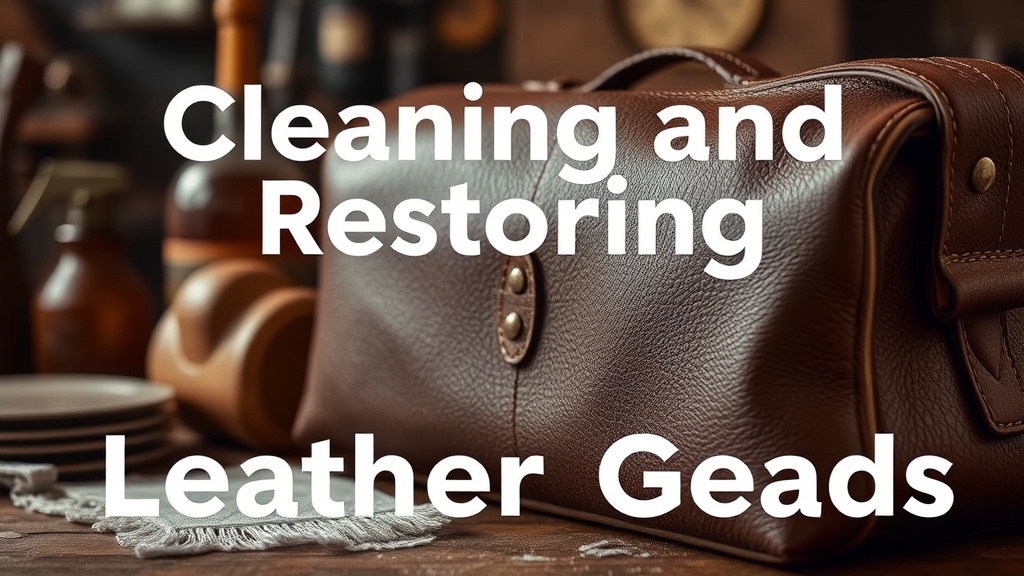
Cleaning and Restoring Vintage Leather Goods

The Longevity of Organic Materials
The average lifespan of high-quality vegetable-tanned leather can exceed one hundred years if the chemical structure of the collagen fibers is maintained through proper hydration and pH balance. Unlike synthetic materials that degrade through polymer breakdown, leather is a biological substrate that reacts to its environment. This guide provides a technical framework for cleaning and restoring vintage leather goods—ranging from Hermès Kelly bags to vintage Gladstone doctor bags—ensuring that structural integrity and aesthetic patina are preserved rather than stripped away.
Proper maintenance requires a transition from "cleaning" to "preservation." Most collectors make the mistake of using aggressive surfactants that strip the essential oils from the hide, leading to irreversible cracking. To restore a vintage piece, you must understand the distinction between surface contaminants, deep-seated grime, and structural dehydration.
Identifying the Leather Type
Before applying any solution, you must identify the specific treatment of the leather. Applying a heavy wax to a delicate kidskin or a suede surface will cause permanent damage. Use the following classifications to determine your approach:
- Full-Grain Vegetable Tanned: Often found in high-end vintage luggage and heirloom belts. This leather is highly reactive to moisture and develops a deep patina over time. It requires oils and waxes rather than heavy creams.
- Chrome-Tanned: Common in mid-century designer handbags. This leather is more water-resistant and chemically stable, but it can become stiff if the oils evaporate.
- Suede and Nubuck: These are napped surfaces. They are highly porous and cannot tolerate liquids or oils. Any attempt to "condition" suede with traditional leather creams will ruin the texture permanently.
- Patent Leather: A coated leather with a high-gloss finish. This requires non-abrasive cleaning to avoid scratching the plasticized topcoat.
The Essential Toolkit
Precision in restoration requires specific tools. Avoid household cleaners, which often contain ammonia or alcohol that can dissolve the tanning agents. Assemble the following:
- pH-Neutral Leather Soap: Brands like Saphir (specifically their Reno'mat or gentle soaps) are industry standards for a reason.
- Horsehair Brushes: Essential for removing dry debris without scratching the grain.
- Cotton Chamois or Microfiber Cloths: Used for gentle wiping and buffing.
- Leather Conditioner: Look for high-quality creams containing mink oil, neatsfoot oil, or lanolin.
- Distilled Water: Tap water contains minerals and chlorine that can leave white residues on the leather surface.
- Soft Toothbrush: For cleaning recessed stitching and hardware edges.
Step 1: The Debris Removal Phase
The first step in any restoration is the mechanical removal of loose particulate matter. If you apply a liquid cleaner before removing dust, you are essentially grinding the grit into the pores of the leather, which acts as an abrasive. Use a soft horsehair brush to sweep the entire surface of the item. Pay close attention to the seams and the areas where the leather meets metal hardware or stitching. If the item is a vintage briefcase, ensure you empty all internal compartments to prevent internal debris from interfering with the process.
For textured leathers or those with heavy grain, a soft-bristled toothbrush is more effective for dislodging dust from the valleys of the grain. Work in light, circular motions to avoid stretching the fibers. If the item has significant dust buildup, a vacuum with a brush attachment held slightly above the surface can also be used, provided no direct suction is applied to the leather itself.
Step 2: Deep Cleaning and Surface Decontamination
Once the dry debris is removed, you must address surface oils, salt stains, or old grime. Create a solution using a small amount of pH-neutral leather soap and distilled water. The goal is not to soak the leather, but to create a controlled cleaning medium.
The Damp Method: Dampen a microfiber cloth with the solution. It should be barely moist, not dripping. Wipe the leather in small, consistent sections. Do not move to the next section until the current one is dry to avoid "water spotting." For stubborn stains, such as ink or old grease, use a specialized leather cleaner like Saphir Unicharm. If you are working on a vintage piece that also contains delicate metal components, be extremely careful not to let the cleaning solution pool around the rivets or buckles, as this can cause oxidation.
After cleaning, use a fresh, dry cloth to blot any excess moisture. The leather should feel slightly supple but should not look "wet." If the leather feels tight or stiff after cleaning, it is a sign that the cleaning process has stripped some of the surface oils, and you must proceed immediately to the conditioning phase.
Step 3: Rehydration and Conditioning
Conditioning is the most critical step in long-term preservation. This process replaces the oils lost through age and environmental exposure. For vintage items, I recommend a two-stage approach: a liquid penetrant followed by a cream conditioner.
Applying a Penetrating Oil: For heavily aged, dry full-grain leather, a light application of a highly refined oil (like a specialized leather oil) can help penetrate the deep fibers. Apply a very small amount to a cloth—never directly to the leather—and work it into the surface. This is particularly effective for vintage leather straps or handles that have become brittle.
Applying a Conditioning Cream: For general maintenance and aesthetic restoration, use a high-quality leather cream. Apply the cream in thin, even layers using a soft cloth. The key is "less is more." If you apply too much, the leather will become greasy and will not absorb the product, leading to a buildup that attracts more dust. Let the conditioner sit for at least 20 to 30 minutes. This allows the organic compounds to settle into the grain.
After the resting period, use a clean horsehair brush to buff the leather. This mechanical action generates a small amount of heat, which helps the oils settle and brings out a natural, healthy luster. This is the same principle used when maintaining the finish on high-end wooden furniture or even the precision-engineered surfaces of vintage watch cases.
Step 4: Hardware and Edge Care
A vintage leather bag or wallet is often defined by its hardware. Brass, nickel, and gold-plated buckles can tarnish or lose their luster alongside the leather. Once the leather is conditioned and dry, inspect the metal components.
- Polishing: Use a specialized metal polish on a cotton swab to clean the edges of buckles and zippers. Avoid getting polish on the leather, as the chemicals can be caustic.
- Edge Painting: On high-end leather goods, the edges are often "painted" or "burnished." If this paint is cracking or peeling, you may need a specialized edge lacquer to seal the raw leather fibers and prevent further fraying.
- Stitching Inspection: If you notice loose threads, do not pull them. Use a fine needle or a specialized thread tool to tuck them back into the seam, or use a tiny drop of specialized leather glue to secure the end.
Common Pitfalls to Avoid
In my work restoring precision instruments and vintage collectibles, I have seen how one incorrect decision can ruin a piece. In leather restoration, the most common errors are:
- Over-conditioning: This leads to "bloated" leather that feels mushy and loses its structural shape. If the leather feels heavy or overly soft after conditioning, you have used too much product.
- Using Heat to Dry: Never use a hairdryer or place leather near a radiator to speed up the drying process. Rapid evaporation of moisture causes the collagen fibers to shrink and crack. Always air-dry at room temperature.
- Ignoring the Interior: A vintage bag's interior is often lined with fabric or thin calfskin. If the interior is dirty, it can transfer grime back to the exterior. Clean the lining with a gentle vacuum and a very lightly dampened cloth.
Long-Term Storage Protocols
Restoration is only half the battle; preservation is the final goal. Once your vintage item is clean and conditioned, how you store it determines its future value. Store leather goods in a cool, dry place with consistent temperature and humidity. High humidity leads to mold and mildew, while low humidity leads to dryness and cracking.
Avoid storing leather in plastic bins or airtight bags, as these trap moisture and prevent the leather from "breathing." Instead, use breathable cotton dust bags. If you are storing a structured bag, stuff it with acid-free tissue paper to help it maintain its shape. This prevents permanent creasing and structural collapse during long-term storage.
Steps
- 1
Dusting and Surface Cleaning
- 2
Testing for Sensitivity
- 3
Applying a Gentle Cleanser
- 4
Deep Conditioning
- 5
Air Drying and Buffing